No more rubber replicas – automated measurement inside tight spaces
Published on December 11, 2018
Evolution of measurement in hard-to-reach spaces
Traditionally, many hard-to-reach surfaces have been measured by taking a mold by replication and bringing the replica under a microscope or optical comparator. For example, silicone rubber-based replicas are still being used to measure defects in inaccessible surfaces in aircraft structures. Although simple to execute, using rubber or silicone replication for high-resolution measurement is time-consuming, labour intensive, and practical only for inspecting small areas.
Measuring with non-contact small-diameter probes
For more efficient inspection inside complex components, Novacam has designed and developed BoreInspect and TubeInspect, two non-contact 3D metrology systems that bring quality inspectors significant time savings and an opportunity to automate such measurements. The systems measure inside tight spaces in a direct and automated manner and with precision down to the micron.
Both BoreInspect and TubeInspect are equipped with application-specific side-looking fiber-based probes with diameters as small as 0.5 mm to reach inside tight spaces. They are suitable for both lab and shop-floor environments, as well as for fully automated measurement.
The two systems bring quality inspectors the following capabilities:
- Non-contact micron-precision 3D measurements on inside diameters (IDs)
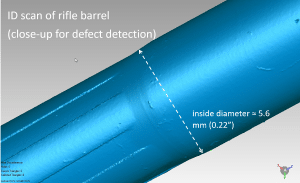
- Ability to measure ID feature dimensions (geometric dimensioning and tolerancing (GD&T) parameters), roughness, defects, and/or thickness
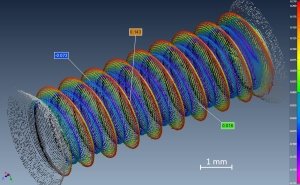
- Measurements of high-aspect-ratio features such as undercuts, steps, channels, cross-holes, splines, threads, or O-ring grooves
- Support for automation
- Versatility for integration with robots, various stages, or online inspection stations.
Which system is appropriate for my application?
While the underlying technology – low-coherence interferometry – is the same, the design of the BoreInspect and the TubeInspect make them ideal for different application needs:
1) TubeInspect
IF the part to be measured is a tube or cylinder AND IF the tube or cylinder can be fixed in a chuck or collet on a rotational stage THEN … typically the TubeInspect is recommended.
The TubeInspect spins the measured tube or cylinder while advancing its side-looking probe along the inside wall.
A unique benefit of TubeInspect is that, depending on the component and the stage setup, it can be used to measure both the ID and the OD of the tube or cylinder.
IF the part ID or OD is not shaped like a tube or cylinder, this does not mean that TubeInspect cannot measure it. Many other shapes – ones are square, octagonal, or otherwise irregular in nature – can be measured with TubeInspect. Parameters such as component size, weight, location, etc. need to be evaluated, so it’s best to consult with our application specialists to determine the best configuration.
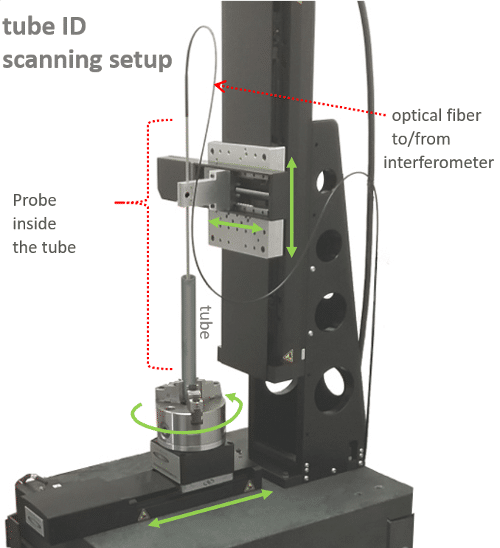
TubeInspect measuring a tube ID. The same system can measure the tube OD.
2) BoreInspect
IF the bore or crevice to be measured is in a component that cannot be moved or fixed on a rotational stage THEN … BoreInspect will be recommended.
The BoreInspect measures inside diameters by advancing its rotational side-looking probe inside.
The BoreInspect is easily integrated with precision stages or as an end-effector on robotic arms for a completely automated 3D inspection solution.
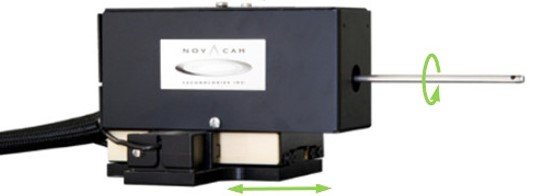
BoreInspect
Examples of applications
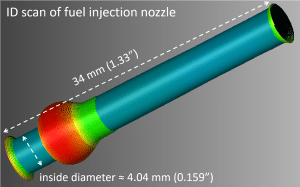
The TubeInspect and BoreInspect are measure inside tight spaces across industries…
- Aerospace: valves, cylinders, manifolds; drilled rivet holes at aircraft fuselage assembly, fir tree slots, airfoils, vanes, turbine blades
- Automotive: valve body bores, valve seats, cylinder blocks, cylinder heads, hollow shafts (e.g., automatic transmission clutch
shafts), fuel injector nozzles, actuators - Defense: bores, barrels, scopes
- Industrial gas turbine engines: compressor and turbine airfoils and vanes, vane rings, duct or nozzle throats, shafts
- Machining: bores and slots in parts for defense, industrial, medical equipment, nuclear, oil and gas, power generation industries
- Medical equipment and devices: threaded interiors of orthopedic implants
- Various: extrusion dies, feed-through holes, blind holes
Where can I learn more about this?
- Download application note “Inspecting Hard-to-Reach Surfaces” [PDF, 4 pages, 1.2 MB]
- Visit the BoreInspect and TubeInspect product pages
- Let us help you figure out how to measure inside defects and features without surface replication


